Facial Poses and UI
Creating Poses on shp_face
Now that the hierarchy is in place and the modifiers have been added to introduce the necessary logic into the rig's behavior, we can move on to setting up the facial poses.
Before anything else, check the facial module options to ensure that the pose nodes have been properly created in the rig hierarchy.
All operations related to poses will be done in Mikan's Posing tab.
Select the shp_face module, then click Group and Driver.

Creating the Pose Channels
We can now begin creating the poses.
Two methods are available:
- use the Posing tab to create the poses directly;
- or edit a modifier plug on a node, where you list all the poses you want to create.
Method 1: Creating Poses Through the Posing Tab
- In the Pose Editor window, right-click under the pose editing buttons to create a pose.
Example: open mouth.
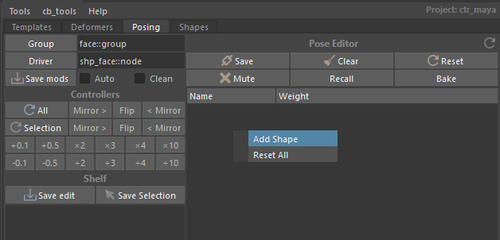
- Repeat this operation for all the poses you want to add.
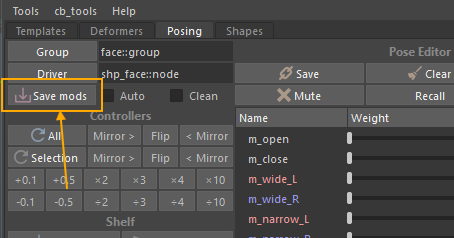
- When finished, click Save Mods in the Posing tab to generate the corresponding note on the shp_face node.
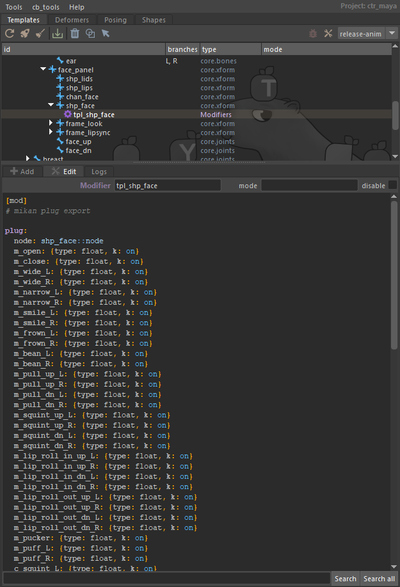
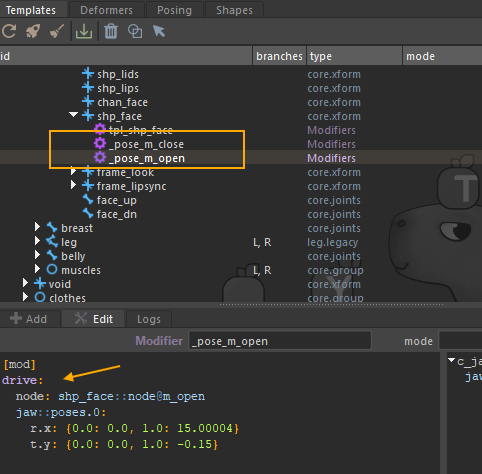
Method 2: Creating Poses Using a Modifier Plug
Create a helper node on shp_face and add a modifier plug, where you will write the full list of poses to generate.
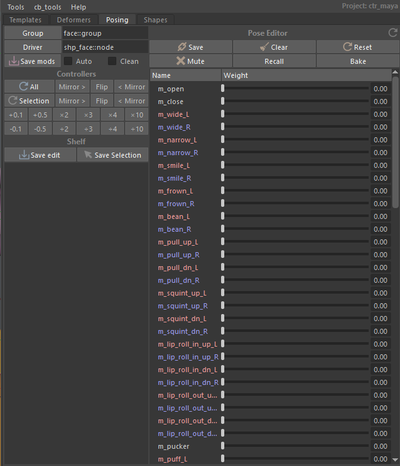
Creating Poses on the Channels
Once all the channels are created, you can record the poses.
It is recommended to create pose shelves in order to:
- test the poses,
- flip and mirror them,
- and check combinations (e.g., Left/Right).
This makes pose editing much smoother.
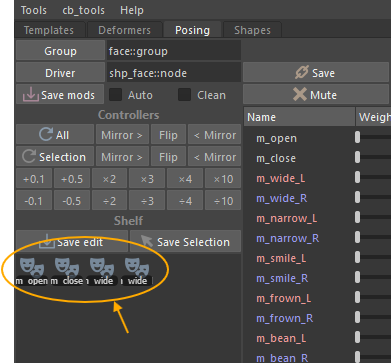
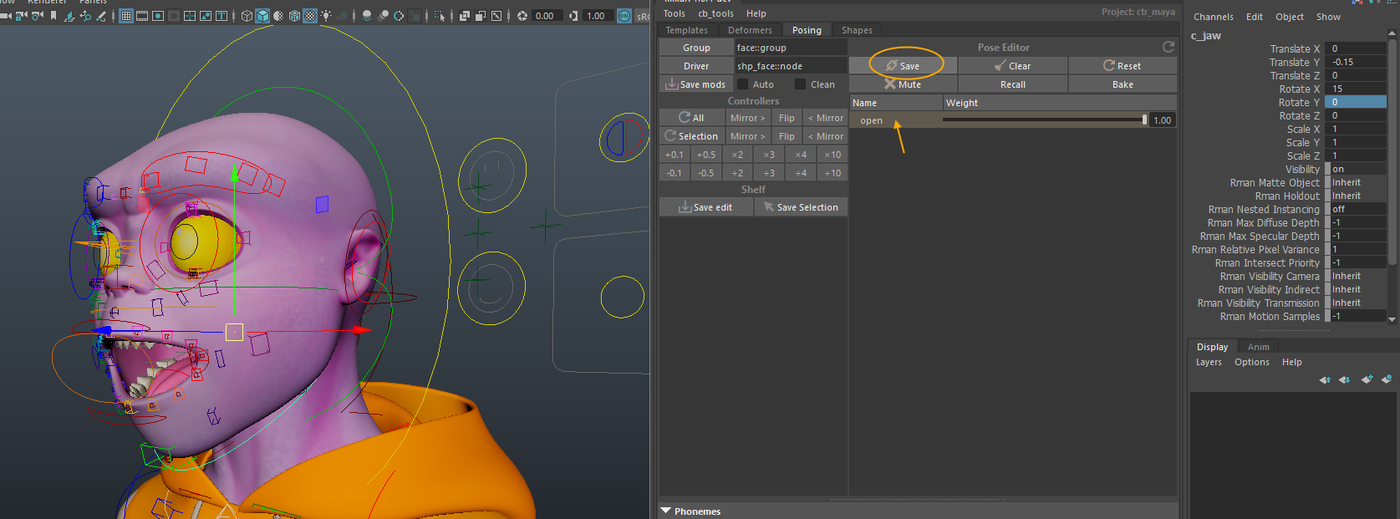
Procedure to Record a Pose
- Activate the pose by clicking the corresponding shelf.
- Select the channel in the Pose Editor.
- Click Save.
Saving to the Template
After recording all the poses, make sure to click Save Mods so the drives edited in the Pose Editor are saved into the template.
If you skip this step, you will lose your poses during the next rebuild.
Connecting the Poses to the Face UI
To connect the facial poses to the Face UI, create a helper node on chan_face.
On this node, create a shape.channel modifier.
Assign a negative priority to ensure that the connections occur after the pose setup.
[mod]
# -- channel shapes
#!-100

shape.channel:
 node: chan_face::node
 sources:
  - shp_face::node
 target: face_dn::ctrls.0

 shapes:
  - mouth:
     sep: on
  - m_open:
     driven:
       m_open: 1
       m_close: -1
     min: -1
     max: 2
  - m_stretch:
     div: [L, R]
     min: -2
     max: 2
     driven:
       m_wide: 1
       m_narrow: -1
  - m_emote:
     div: [L, R]
     min: -2
     max: 2
     driven:
       m_smile: 1
       m_frown: -1

  - teeth:
     sep: on
  - t_roll_up
  - t_roll_dn
  - t_emote:
     div: [L, R]
  - t_stretch:
     div: [L, R]
  - t_shear:
     div: [L, R]

 combo:
   m_wd_sm:
    drivers:
      m_wide: 1
      m_smile: 1
    div: [L, R]
   m_nw_sm:
    drivers:
      m_narrow: 1
      m_smile: 1
    div: [L, R]
   m_wd_fn:
    drivers:
      m_wide: 1
      m_frown: 1
    div: [L, R]
   m_nw_fn:
    drivers:
      m_narrow: 1
      m_frown: 1
    div: [L, R]

shape.channel:
 sources:
  - shp_face::node
 target: face_up::ctrls.0

 shapes:
  - e_stretch:
     div: [L, R]
     min: -2
     max: 2

  - eyebrows:
     sep: on
  - eb_in:
     div: [L, R]
     driven:
       eb_up_in: -1
       eb_dn_in: 1
     min: -3
     max: 3
  - eb_out:
     div: [L, R]
     driven:
       eb_up_out: -1
       eb_dn_out: 1
     min: -2
     max: 2
  - eb_squeeze:
     div: [L, R]
     min: 0
     max: 2
  - eb_bend:
     div: [L, R]
     min: -2
     max: 2


  - eyelids:
     sep: on
  - el_blink:
     div: [L, R]
     min: -0.2
     max: 1
     clamp: on
  - el_roll_up:
     div: [L, R]
     min: -0.5
     max: 1.5
  - el_roll_dn:
     div: [L, R]
     min: -0.5
     max: 1.5

 combo:
   eb_sqz_dn:
    drivers:
      eb_squeeze: 1
      eb_dn_in: 1
    div: [L, R]
Connecting the Poses to c_lipsync
On the lipsync node, set up the drives that connect the facial poses to c_lipsync:
[mod]
#!-100
drive:
  node: lipsync::ctrls.0@t.x
  chan_face::node:
    m_stretch_L: {-1: -1, 0: 0, 1: 1}
    m_stretch_R: {-1: -1, 0: 0, 1: 1}

drive:
  node: lipsync::ctrls.0@t.y
  chan_face::node:
    m_open: {-1: 1, 0: 0}