Building a Basic Rig
Main Interface Overview
Mikan's interface is divided into four main tabs:
-
Templates – create rig template modules and edit their options.
-
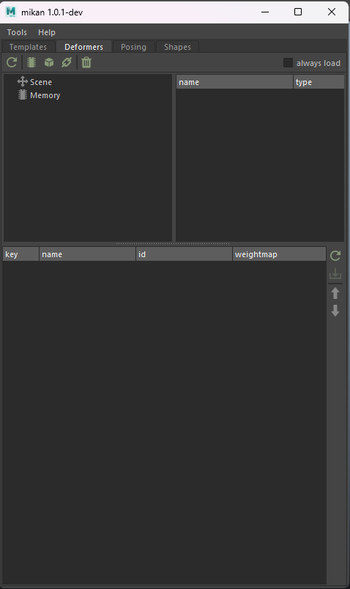
Deformers – manage deformation data for your meshes.
-
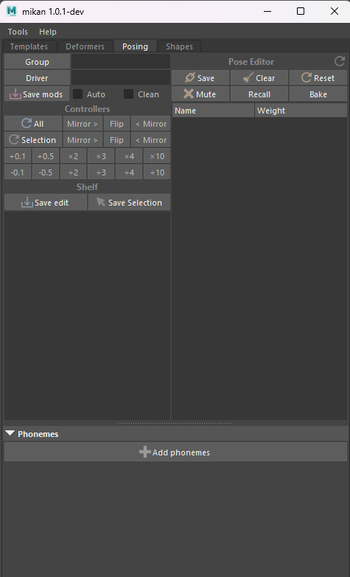
Posing – create and edit poses for your rig.
-
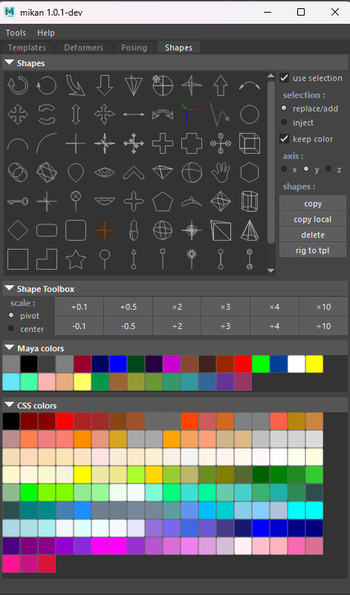
Shapes – edit the appearance of rig controllers.
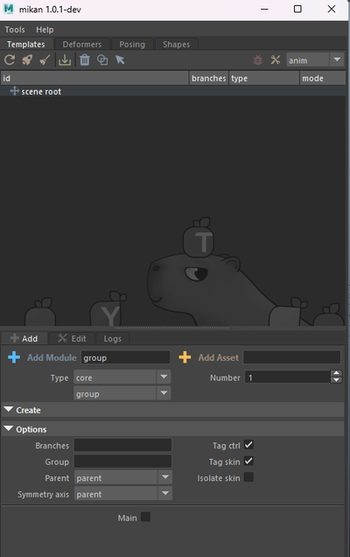
Templates Tab in Detail
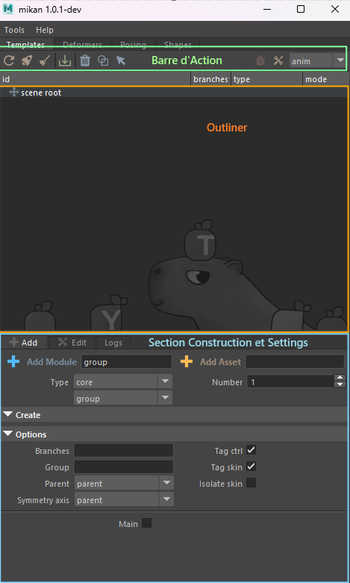
- ACTION Section – buttons to build or delete a rig, edit shapes, or select elements.
- OUTLINER Section – hierarchy of the rig currently being built.
- CONSTRUCTION Section:
- ADD – choose template modules to add to the rig and set their initial options (these can be modified later).
- EDIT – update options after a module has been created.
- LOGS – track progress and messages during the build process.
Creating Your First Rig
Setting Up the First Modules
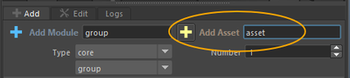
The first step is to create the top node of the rig: the asset node.
This acts as the rig container. It stores all template data (module hierarchy, modifiers, deformation info) and manages their execution.
To create it:
- go to the Add tab in Templates,
- fill in the Asset field with your rig's name,
- then click the orange plus button on the left.
With the top node in place, you can begin building your module hierarchy.
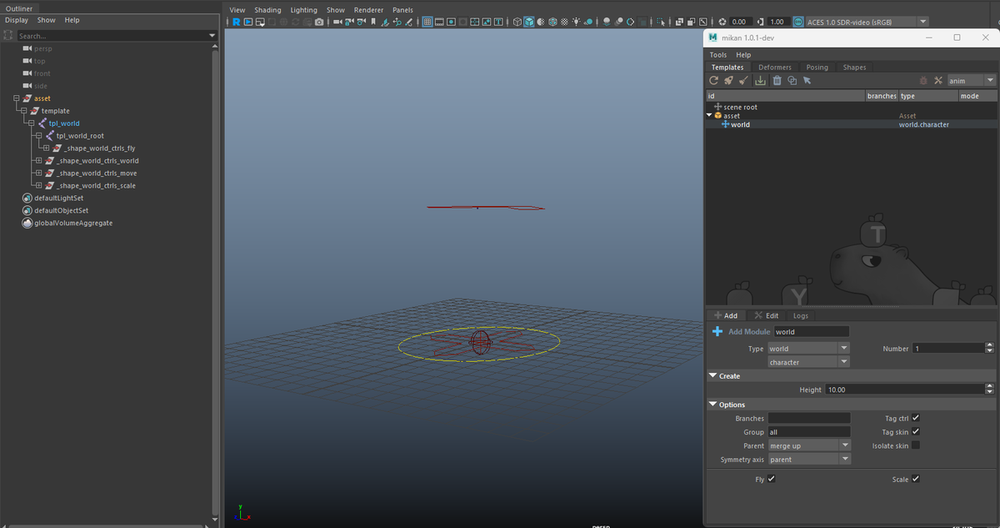
We typically start by adding a WORLD module, the base module used to move the entire rig within the scene.
This creates the c_world controller, along with:
- c_move – for managing the asset's trajectory,
- c_fly (optional) – similar to move but with a pivot centered on the character's center of gravity,
- c_scale (optional) – for scaling the asset, with squash options and an adjustable pivot.
Click the Toggle Shapes icon to display controllers directly in Maya's viewport:
From there, you can continue adding the modules required for your rig.
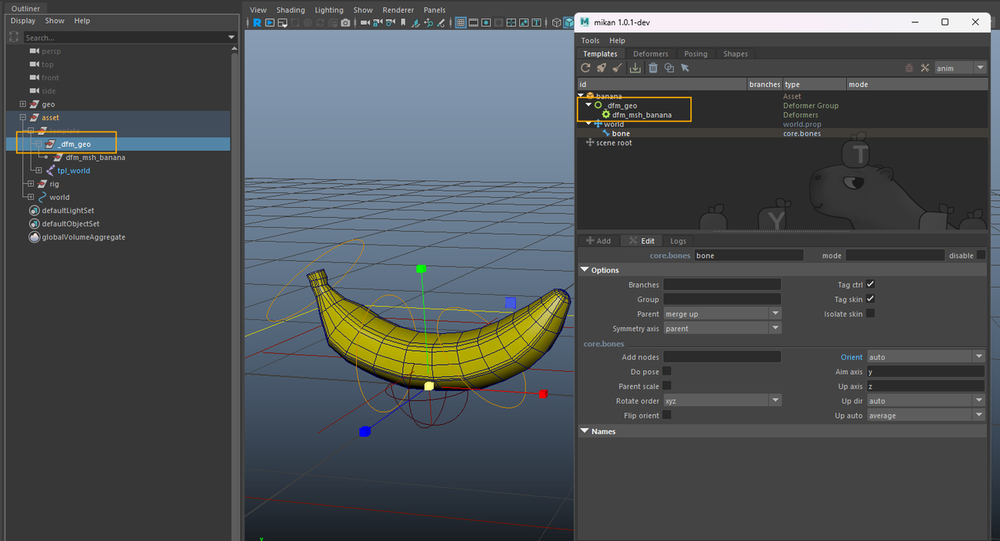
Example 1 : A Simple FK Chain
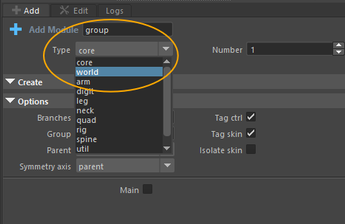
From the Add Template dropdown menu:
- select the Core type,
- then choose the Bones module.
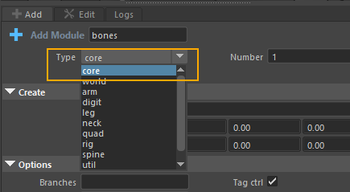
Main options include:
- number of joints,
- root placement relative to the parent,
- chain orientation.
Click Add Template to create the module.
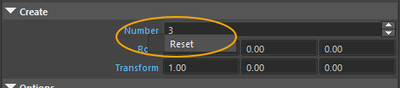
when you modify an option, it turns blue.
👉 Right-click Reset to restore the default value.
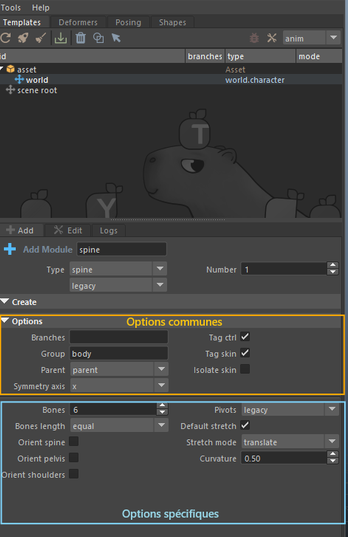
Example 2 : Spine Module for a Character
From the Add Template dropdown menu:
- select the Spine type.
As with the Bones module, you'll find general options (branch, symmetry), plus module-specific options such as:
- number of bones,
- controller orientation,
- pivot of the first IK controller,
- stretch.
Placing and Adjusting Modules
After creating a module, you can position it relative to your geometry.
👉 No need to worry about joint orientation – Mikan automatically adjusts this during the build, based on your chosen options.
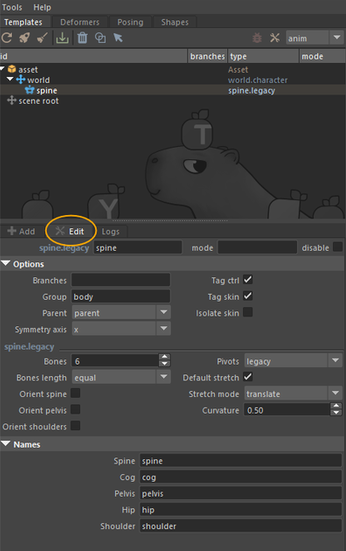
You can also rename a module and update its options by double-clicking it in the outliner (this opens the Edit tab).
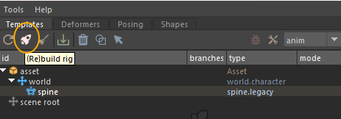
At any time, you can test the rig by running a build via the rocket icon at the top of the Templates tab.
Build logs are displayed in the Logs tab.
Customizing Controller Shapes
To display all controller shapes:
- select the asset top node,
- click the Toggle Shapes icon.
Then, select the shapes you'd like to customize and either:
- use the Shapes tab,
- or modify them directly in the scene.
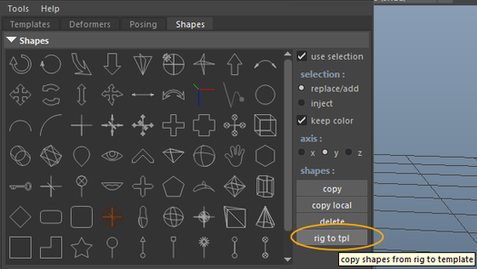
The Shapes tab provides:
- a library of preset shapes,
- a color library,
- resizing tools.
always customize shapes on the template.
👉 If you edit shapes directly on the rig, these changes will be lost on the next rebuild since only the template stores the information. ✨ To preserve your adjustments, use the Rig to Tpl button to push those modifications back into the template.
Binding
Once your template is ready, the next step is binding – linking the rig to the model.
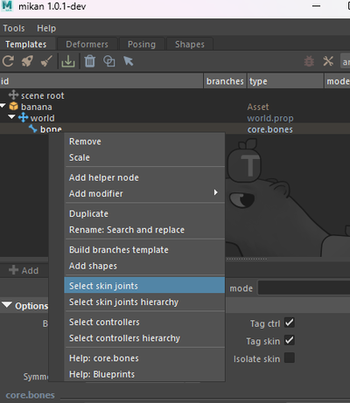
In complex hierarchies, skin joints can be hard to select.
From the Mikan outliner: right-click → Select skin joints.
Then skin your geometry as you normally would.
⚠️ Important:
Anything added manually (skinning, clusters, deformers, etc.) will be removed with each rebuild, unless those changes are saved in the blueprint.
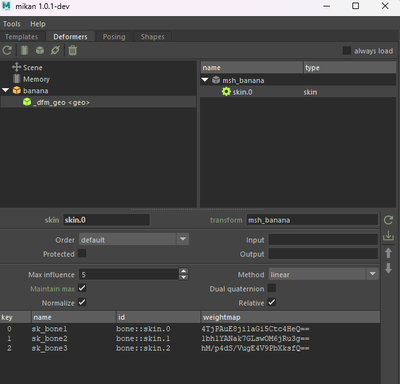
Backing Up Deformers
-
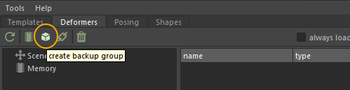
Open the Deformers tab.
-
Select the top node of your modeling hierarchy.
-
Click Create Backup Group → this generates a transform node containing your deformation data.
-
Parent this node under the template group.
This ensures the blueprint preserves your deformation data and reapplies it with every rebuild.
You can safely adjust your template, rebuild the rig, and keep your deformations intact.
Good to Know
The Add tab gives you access to a set of default template modules provided by Mikan. These modules act as the basic building blocks for creating rigs.
👉 By combining these modules and enhancing them with modifiers, you can go far beyond simple setups. This allows you to design more complex and customized templates, perfectly suited to your production needs.
✨ Once created, these templates can be exported and easily reused across different assets, ensuring consistency and saving valuable time throughout the rigging process.
Conclusion
You've now covered the basics of rigging with Mikan:
- the template / blueprint / rig workflow,
- and the seamless process of building, customizing, and iterating.