Using branches
Introduction
A branch in Mikan is a parameter that allows you to create multiple variants of the same template module.
Typical examples:
- left/right symmetry for arms and legs,
- duplication of repeated elements such as tentacles or legs.
👉 Branches ensure consistency and simplify rigging by avoiding manual duplication.
Basics
Defining a branch
The Branches field is located in the template module options.

- Manually type a list of labels separated by commas.
- Example:
[L, R],[up, dn],[1, 2, 3, 4]
- Example:
- Or, right-click to access predefined labels:

If the field is empty, Mikan creates only one module, without duplication or symmetry.
For some template modules where symmetry is obvious (for example arms and legs), this field is already pre-filled with [L, R]. You can, of course, modify or replace these values.
When building the rig:
- Each defined label automatically generates a variant of the module.
- Example:
[L, R]→ one module for the left side and one for the right side.
Notes and Modifiers
When using branches, you don't need to repeat your notes or modifiers for each side.
Example:
- You work on an arm module with a
[L, R]branch. - Enter your notes using the IDs of the left side (for example, the left arm controllers).
- Mikan will automatically mirror this logic for the right side when building.
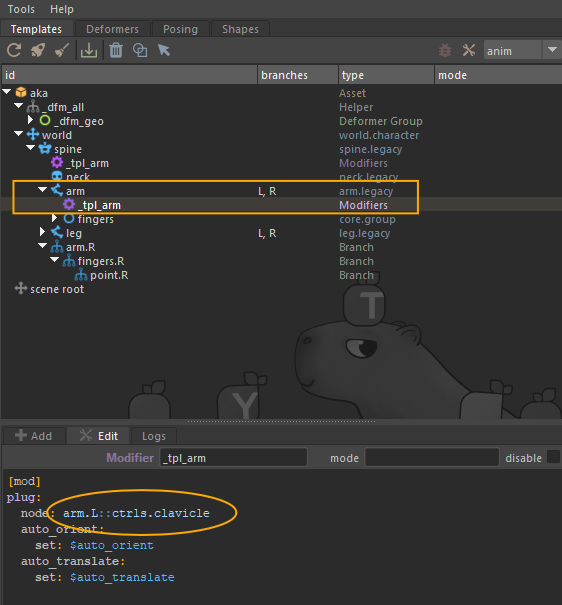
This means:
- no need to copy notes for the right side,
- a clean, consistent, and easy-to-maintain setup, even on complex rigs.
Adapting branches to an asymmetric rig
Imagine a character whose right arm is bigger or longer.

Even if both arms come from the same module with branches, you can edit the template module only for the R side:
- Right-click on the template module.
- Select Build Branches Template.
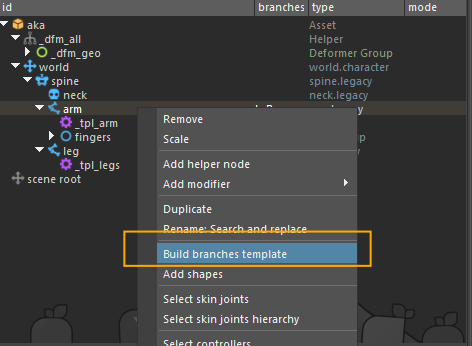
Mikan then generates a branch module (e.g. R if your branches are [L, R]).
You can then directly edit:
- the joint positions,
- the controller shapes.
Do not use branches if the variants are structurally different.
Example: a robot where the left and right arms have completely different mechanics.
👉 In this case, create two separate template modules, without branches.
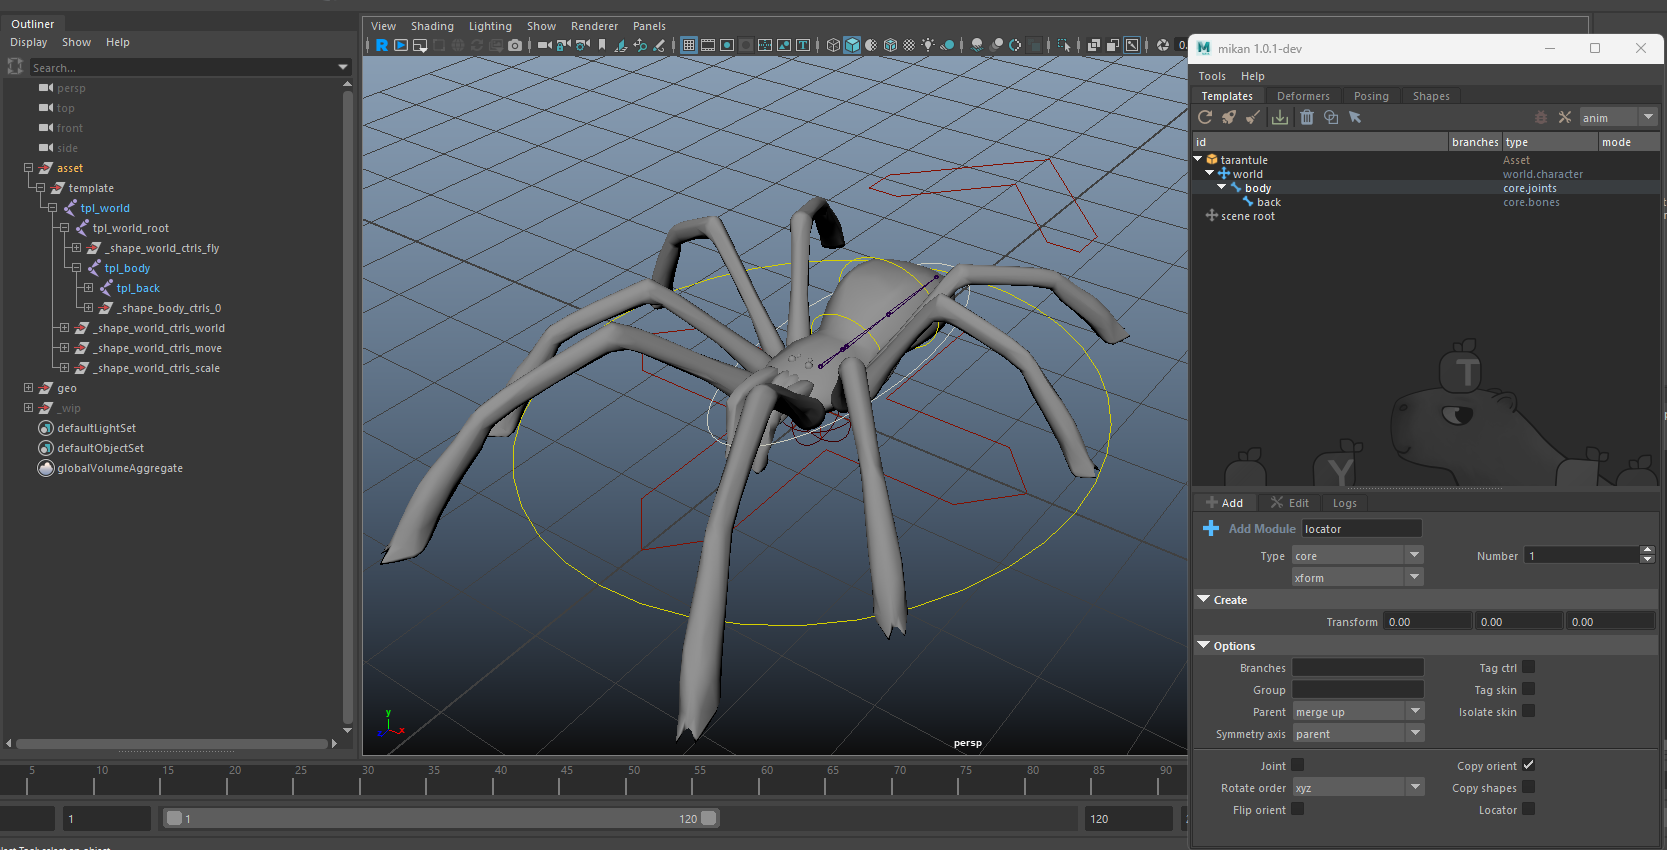
Advanced example: the spider
Spider legs are a typical case for using branches: there are many of them, but they all share the same behavior.
Step 1 : Set up the base template
Let's start with a very simple template made of:
- a WORLD module,
- a joint module for the body,
- a bones module for the back of the spider.
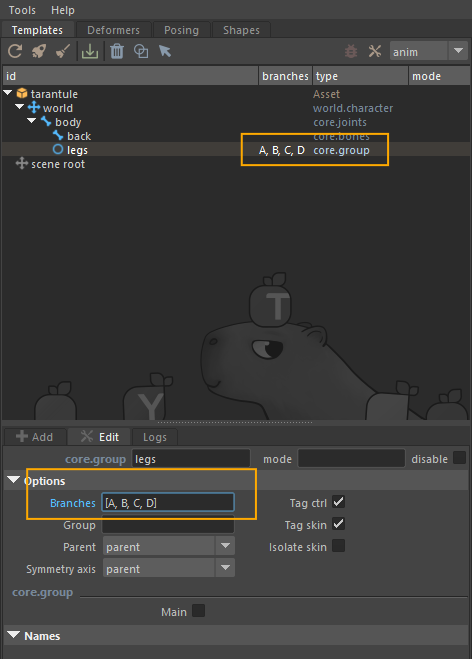
Step 2 : Create a group for the legs
Next, create a modules group to gather all the legs.
- Add a group named legs.
- Define a set of branches: A, B, C, D for the four legs on the left side.
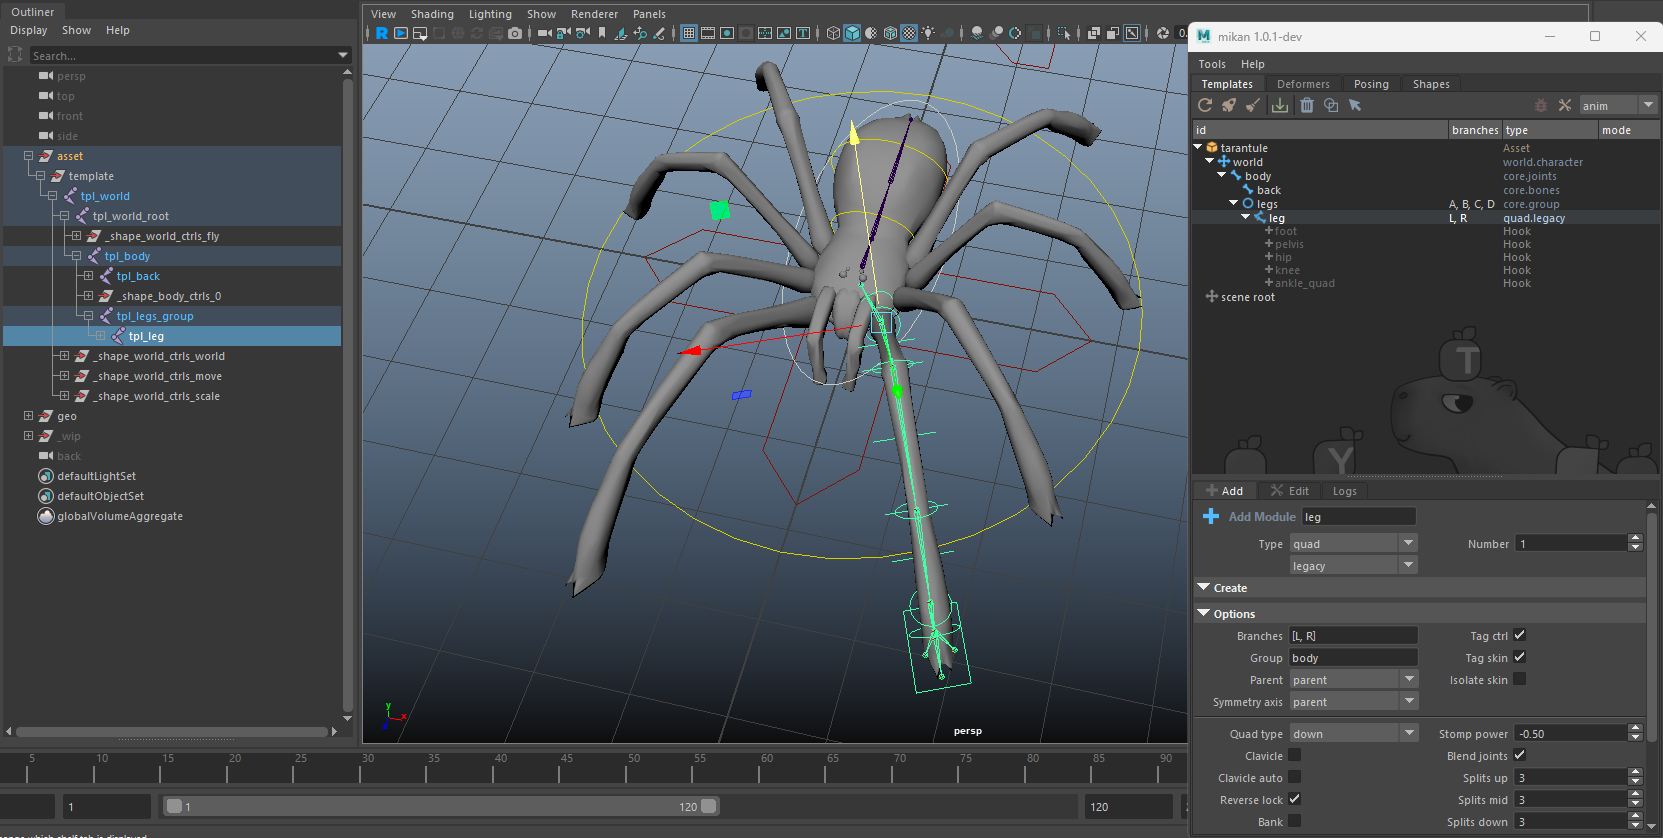
Step 3 : Add a quad module
Now add a standard quad module, configured with the [L, R] branches.
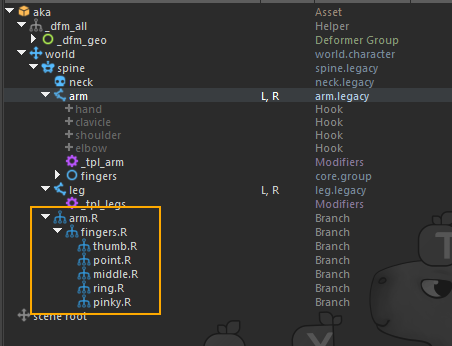
Step 4 : Editing the branches
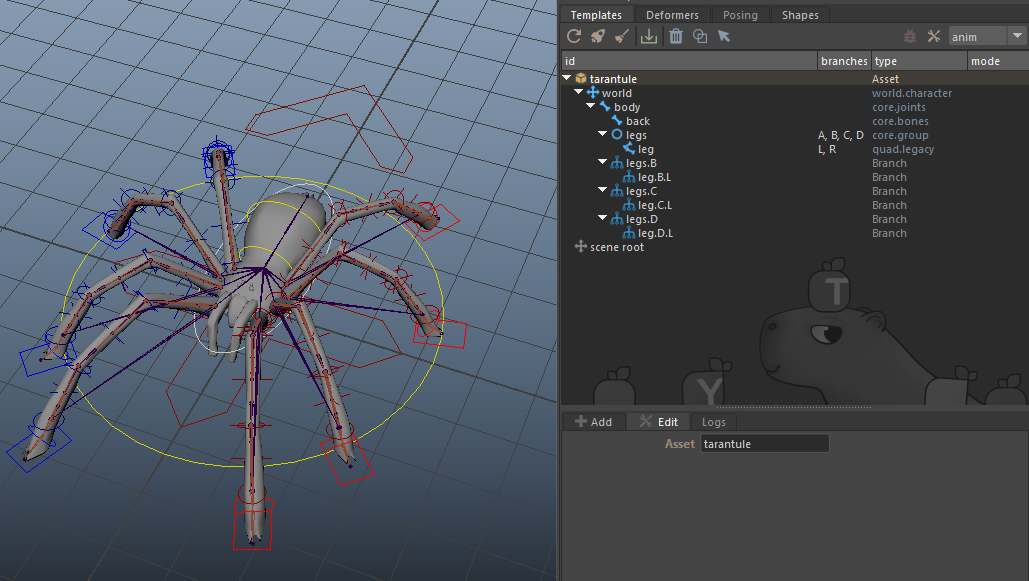
To edit the branches:
- Right-click on the legs group.
- Select Build Branches Template.
By default, Mikan generates branches for both sides [L, R].
But in this case, we only want to edit the branches on the left side (A_L, B_L, C_L, D_L) and keep the symmetry on the right side:
- In the Outliner, select the branches on the R side.
- Delete them using the trash 🗑️ icon.
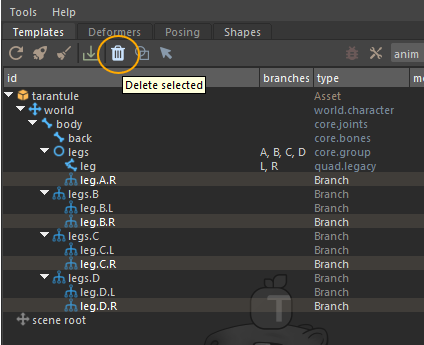
- Then, place and adjust the branches on the left side.
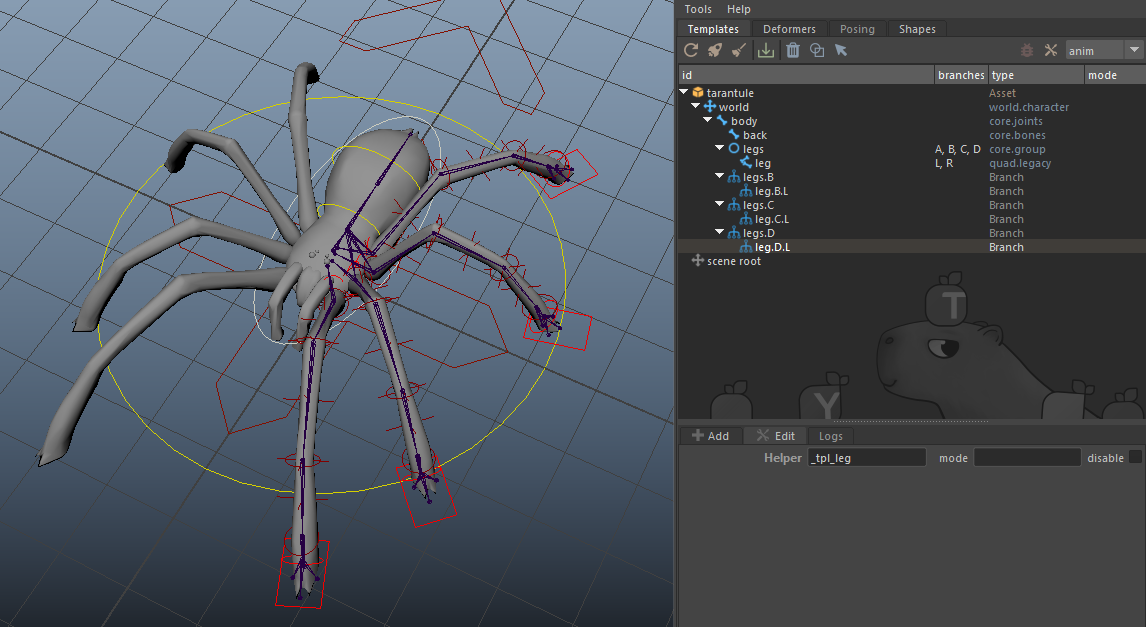
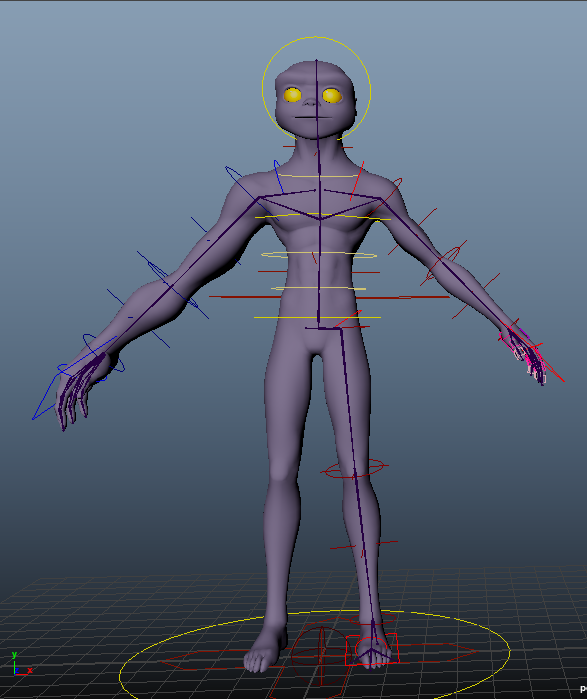
Step 5 : Run a test build
Finally, run a build to check the result:
The rig is correctly generated on all legs, both left and right.
And right-click features also work perfectly.
- Use clear and short labels (
L/R,up/dn,1/2/3/4…). - Always test the build before moving to the next step.
- For complex rigs, branches are highly recommended > easier maintenance.
Quick summary
- Empty Branches field > one single module.
- Defined labels > one variant per label.
- Notes/modifiers > defined once, automatically replicated.
- Asymmetry > use Build Branches Template.